


Haste is a minimalist, momentum-based action game that challenges players to race through procedurally generated shards using fluid movement and precise landings. With its emphasis on speed, flow, and terrain awareness, Haste rewards players who can chain perfect landings, maintain horizontal momentum, and react quickly to environmental cues. This guide breaks down the game’s core mechanics and strategies into ten progressive sections, helping you master every aspect of movement, from basic diving to advanced shard recognition.
- Learning the Core Movement System Haste’s movement is built around momentum. You accelerate by diving, landing smoothly, and chaining actions. The spacebar initiates a dive, which lowers your character and matches terrain slopes for speed gain.
Avoid jumping too high—long airtime slows you down and steepens your landing angle. Instead, aim for low, flat arcs that keep you close to the ground and ready to land. Movement in Haste is not about verticality but horizontal flow.
Key Tips:
- Dive to match terrain and gain speed
- Stay low and smooth for better control
- Avoid high jumps that break momentum
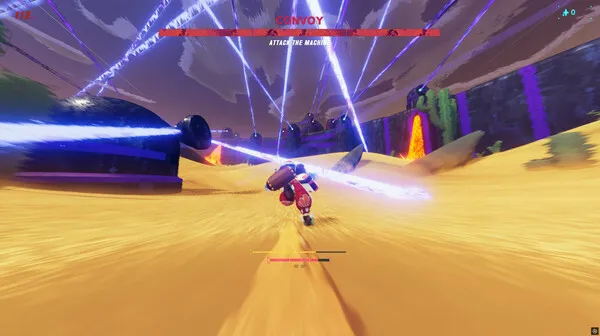
- Perfecting Landings for Speed Boosts Landings are graded: Perfect, Good, OK, and Bad. Perfect landings increase speed and unlock board activation. Good landings maintain speed, while OK and Bad landings reduce it significantly.
To land perfectly, align your character’s angle with the slope and dive just before impact. Use terrain cues to anticipate landing zones. Practice timing and angle adjustments to improve consistency.
Landing Grades:
- Perfect: Boosts speed and enables board
- Good: Maintains current speed
- OK: Slight speed loss
- Bad: Major speed loss and poor trajectory
- Using the Board Strategically The board is a speed-boosting mechanic that activates after a Perfect or Good landing. It flattens your trajectory and accelerates you forward. Use it to chain landings and maintain flow.
Don’t spam the board—use it when approaching downhill slopes or after recovering from a slow segment. The board also helps reset your angle after awkward landings.
Board Tips:
- Activate after Perfect/Good landings
- Use to flatten trajectory and boost speed
- Don’t overuse—timing is critical
- Reading Terrain and Planning Ahead Haste requires spatial awareness. Look ahead to anticipate slopes, jumps, and hazards. Don’t focus solely on your character—scan the environment to plan your route and adjust movement.
Recognize terrain patterns like hills, valleys, and ramps. Position yourself early to align with upcoming slopes. This reduces reaction time and improves landing accuracy.
Terrain Awareness:
- Scan ahead, not just your character
- Identify slope patterns and landing zones
- Adjust position early for smoother flow
- Managing Vertical Momentum Vertical momentum affects your landing angle and speed. High jumps create steep descents, which are harder to land perfectly. Instead, use controlled dives to convert vertical motion into horizontal speed.
Hold the spacebar to dive and carry momentum forward. Avoid jumping straight up—angle your jumps to follow terrain curves. This keeps your trajectory shallow and improves landing chances.
Momentum Tips:
- Convert vertical motion into horizontal speed
- Dive instead of jumping vertically
- Use terrain curves to guide movement
- Recognizing Shard Set Pieces Each shard contains set pieces—predefined terrain segments with specific challenges. Learn to recognize these patterns and adjust your movement accordingly. Some set pieces require precise timing or alternate routes.
Position yourself before entering a set piece. Use visual cues like ramps, gaps, or color changes to anticipate difficulty. Practice each shard to memorize layouts and optimize your path.
Set Piece Strategy:
- Identify terrain patterns and cues
- Position early for optimal entry
- Memorize shard layouts for consistency
- Timing Shrines and Boosts Shrines offer temporary boosts like speed, jump height, or board cooldown reduction. Activate them strategically—during swarms, before jumps, or after slow segments. Don’t waste boosts on flat terrain.
Use shrines to recover lost momentum or prepare for difficult sections. Combine shrine effects with board activation for maximum impact. Learn shrine locations and plan your route around them.
Shrine Tips:
- Activate during key moments
- Combine with board for synergy
- Memorize shrine locations
- Avoiding Common Mistakes New players often jump too high, ignore terrain cues, or overuse the board. These mistakes break flow and reduce speed. Focus on timing, posture, and terrain alignment to avoid errors.
Don’t panic after a bad landing—recover with a dive or board activation. Avoid zigzagging or erratic movement. Smooth, deliberate actions are more effective than frantic inputs.
Mistake Checklist:
- Avoid high jumps and steep descents
- Don’t spam board activation
- Recover calmly after bad landings
- Practicing with Purpose Improvement in Haste comes from focused practice. Replay shards to refine specific skills—landing, diving, or terrain reading. Use slow-motion mode if available to analyze movement.
Set goals for each run: achieve three Perfect landings, maintain speed for 30 seconds, or complete a shard without Bad landings. Track progress and adjust strategies based on results.
Practice Tips:
- Focus on one skill per run
- Use slow-motion for analysis
- Set measurable goals
- Building Flow and Confidence Flow is the essence of Haste. It’s the feeling of seamless movement, perfect landings, and uninterrupted speed. Build flow by chaining actions, anticipating terrain, and reacting smoothly.
Confidence comes with mastery. As you improve, trust your instincts and commit to movement decisions. Don’t hesitate—fluidity is more important than perfection. Embrace the rhythm of the game.
Flow Tips:
- Chain actions for seamless movement
- Trust instincts and commit to decisions
- Embrace rhythm over perfection
Conclusion Haste is a game of rhythm, precision, and momentum. By mastering its movement system—from diving and landing to terrain reading and board usage—you can unlock the full potential of each shard. Whether you're chasing high scores or simply enjoying the flow, these tips and guides will help you move with confidence and speed.